¶ «Timetable» section's main elements overview
The «Timetable» section in MyTaxiCRM allows you to efficiently plan drivers' worksheets and monitor the utilization and availability of vehicles in your fleet. This tool is a convenient way to manage the engagement and workload of company resources: create and monitor driver schedules and vehicle usage; operate available resources to achieve the highest possible efficiency.
¶ General UI overview
- LEFT panel – a list of all vehicles in the selected fleet whose accounts have been added to the system or populated through integration with ride-hailing platforms.
- RIGHT panel – a workspace for creating events of all types in the form of a calendar with weekly data representation, which displays their schedule in specified time intervals.
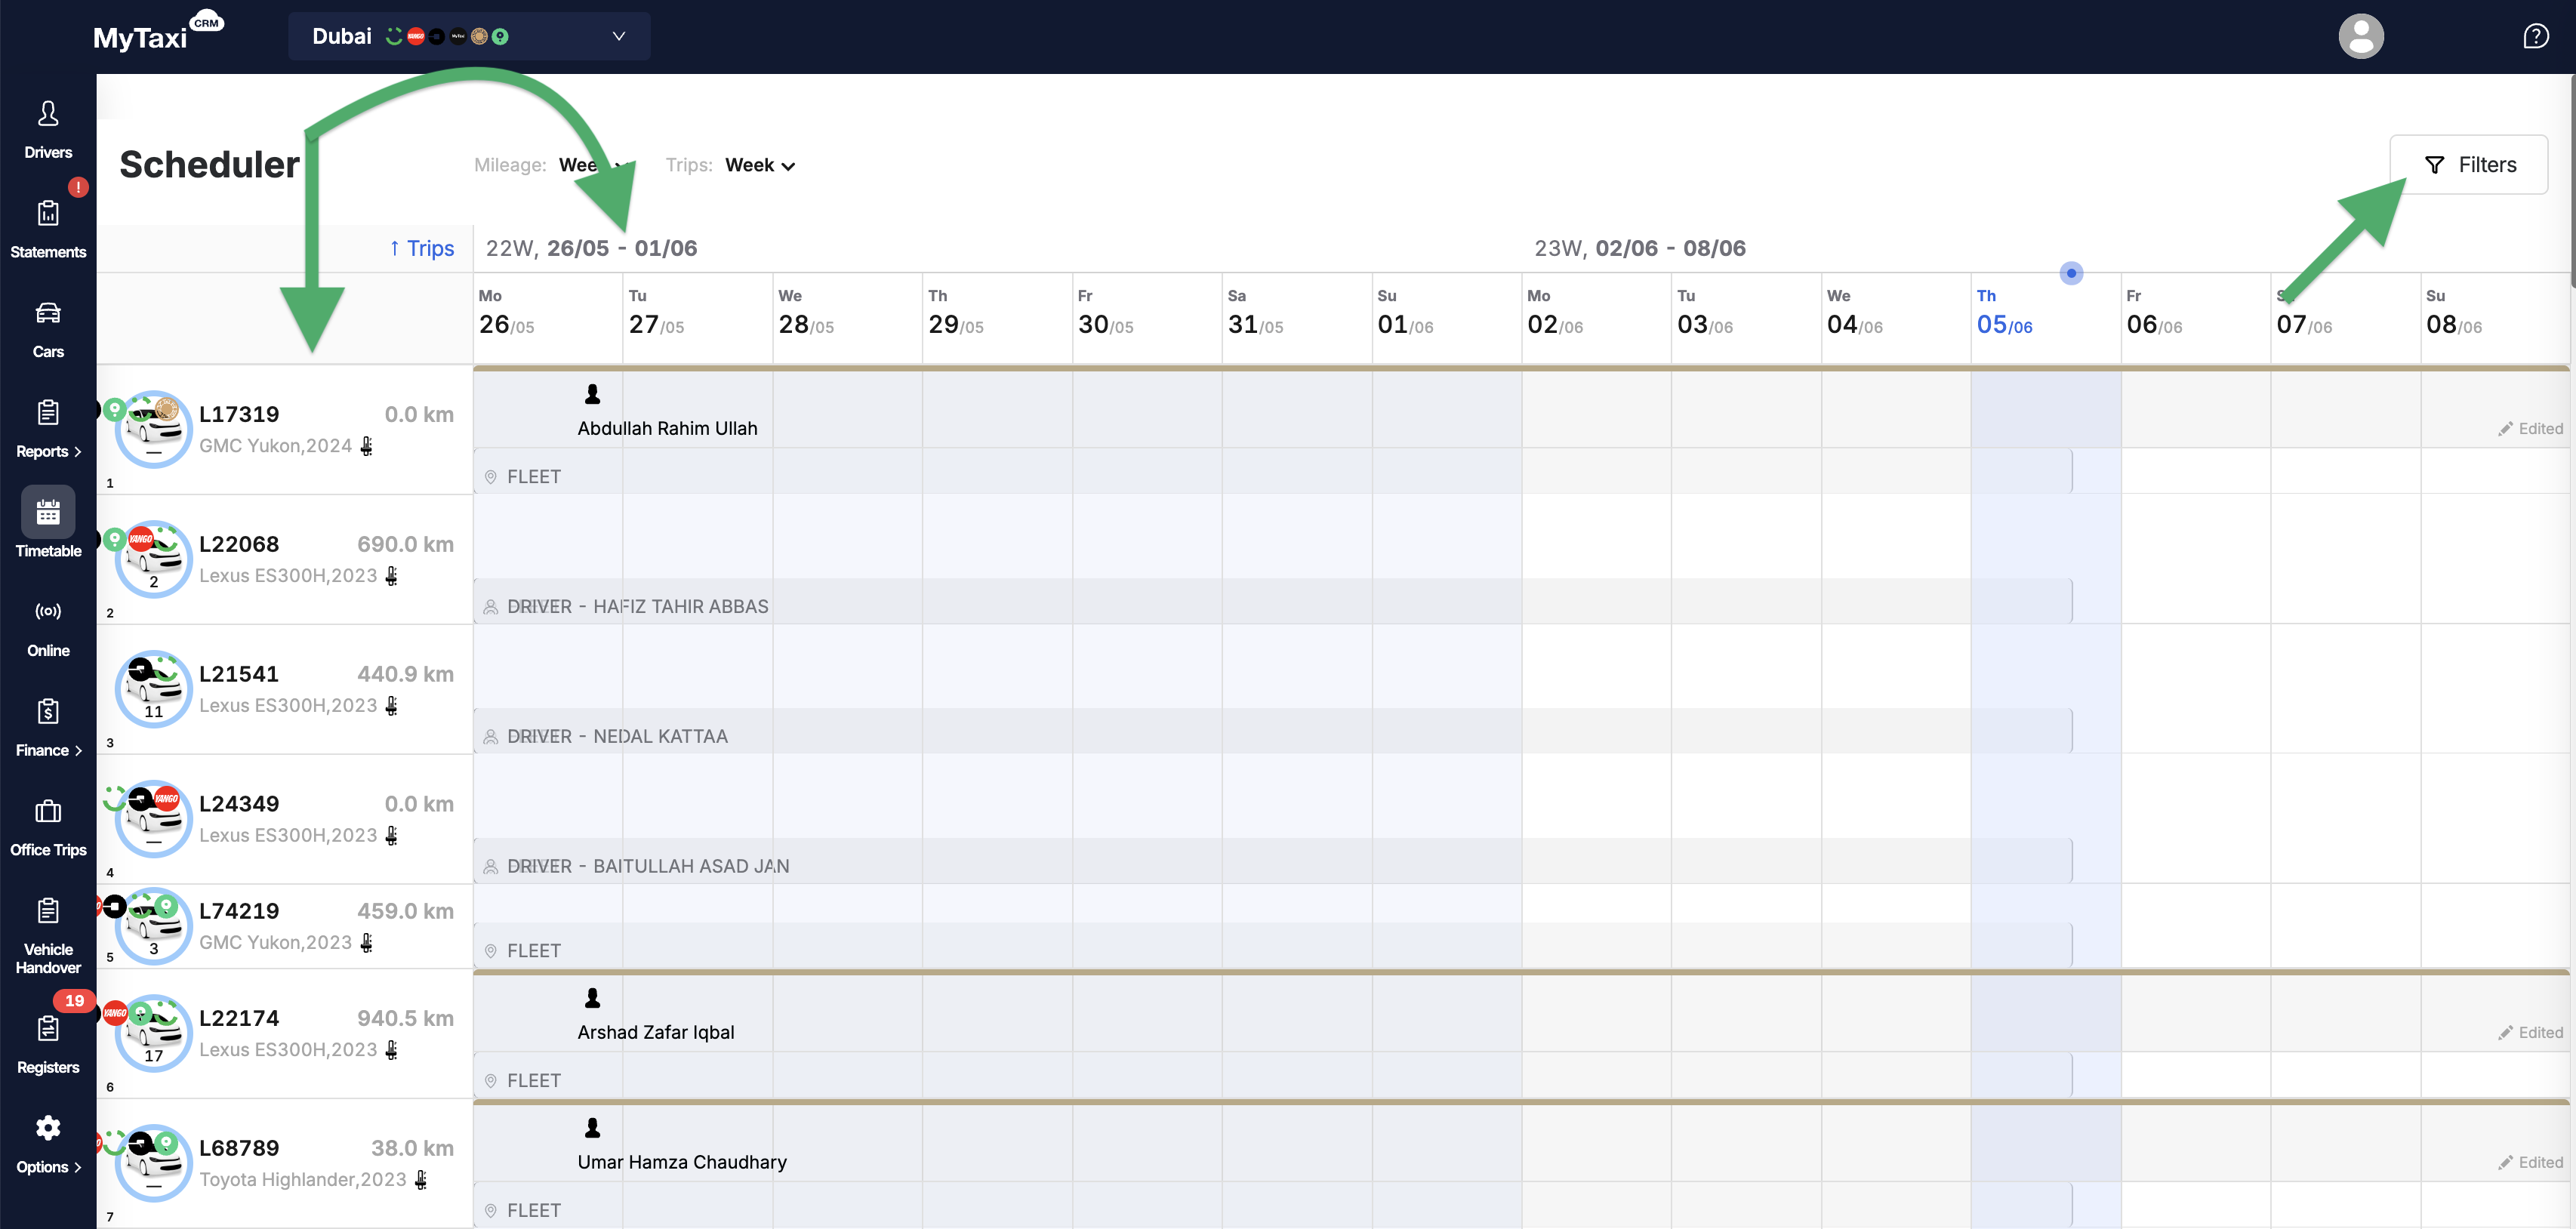
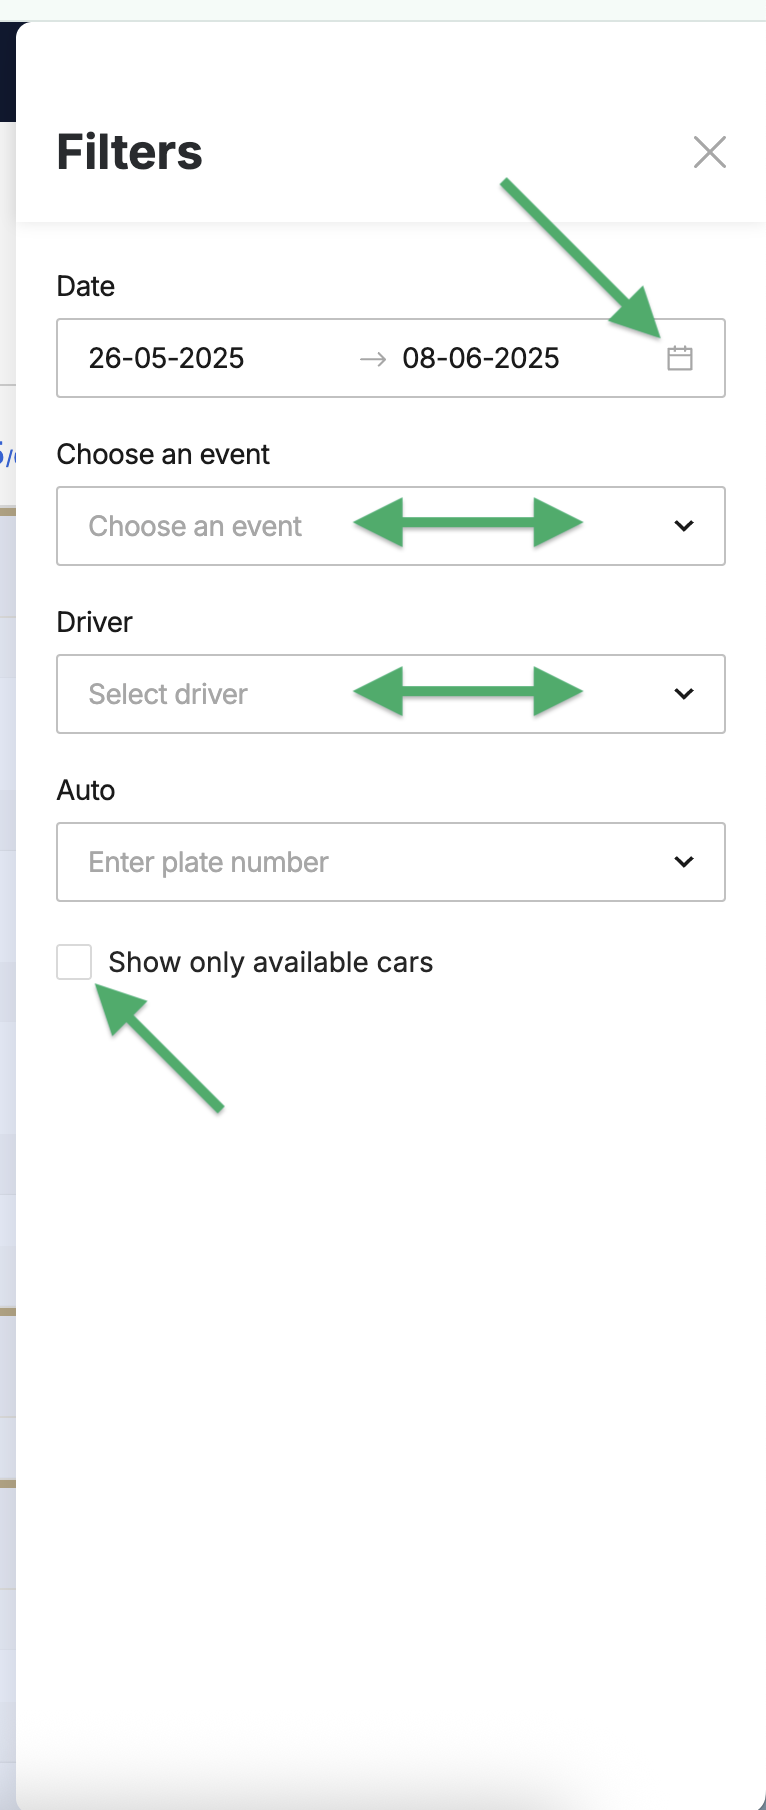
- At the top right, there is a Filters button that allows you to change the way data sets are displayed:
- by time intervals (Date);
- by event types (Choose an event);
- by driver profile (Driver);
- by vehicle account (Auto);
- with the additional checkbox for showing only vehicles that are not currently scheduled for use (Show only available cars).
¶ Types of calendar events & how to create them
¶ How to add an event?
- Click on the calendar field opposite the numberplate of the desired car (a green [
⊕] icon will appear near the cursor). - In the pop-up window, select one of the 7 event types and fill in the relevant information or details
⚠️ It is unnecessary to hit the field at a specific time of day, as you can change the time intervals when creating the event itself. Click on any free space in the calendar field opposite the desired vehicle to bring up the event creation box.
¶ What types of events are there?
In general, events can be divided into two categories:
- Events that help plan the work of fleet drivers – this is done by scheduling vehicle usage in connection with one driver (according to the «One Driver per Vehicle» scheme) or several drivers («Crew» i.e., in shifts).
- Events that are useful for planning the use or availability of the vehicles themselves. In this case, there is no need to assign a driver.
¶ Brief description of event types
There are 7 types of events, each of which can be assigned to each vehicle in the fleet for a specific time period of the day, week, or longer.
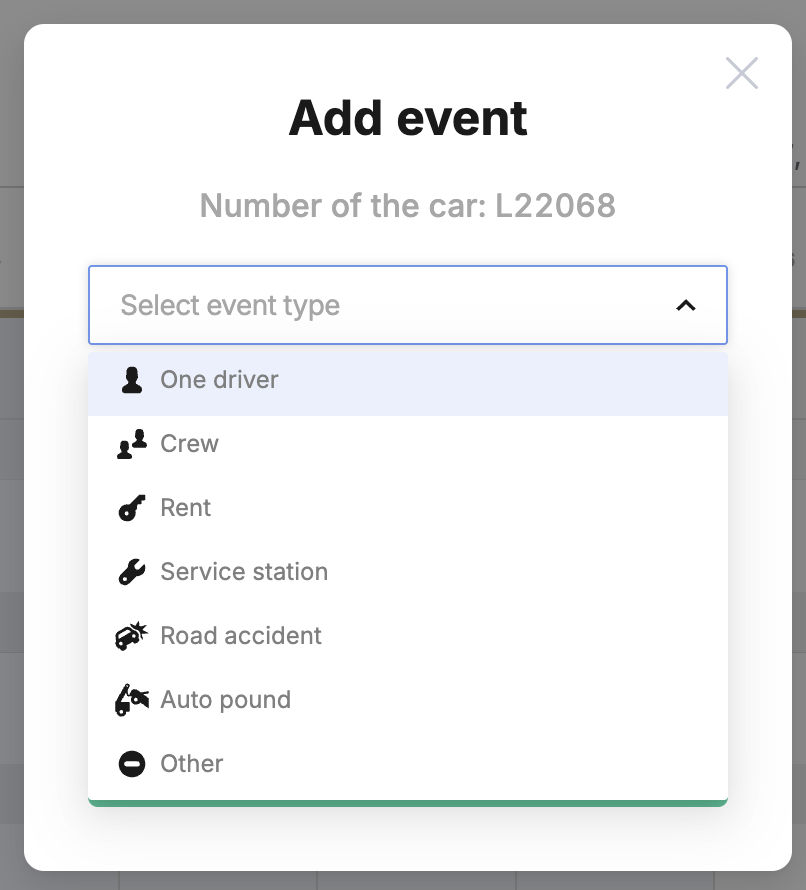
- 👤 «One driver» – assigning a single driver to a specific vehicle (without a teammate/shift colleague). For those fleets that adhere to the «Single Driver» model (where each operational vehicle in the fleet is assigned a single driver who works on it).
- 👥 «Crew» – assigning several drivers to the same vehicle; working in shifts (when each vehicle in the fleet is used more intensively with minimal downtime, and 24/7 uptime is provided by drivers working in shifts at specific intervals).
- 🔑 «Rent» – car rental (when the owner or manager of a vehicle fleet lets a driver rent a vehicle from the fleet under certain financial conditions, such as a fixed weekly rate).
- 🔧 «Service station» – when the vehicle is unavailable for trip execution due to maintenance.
- 💥 «Road accident» – when a vehicle is temporarily out of service due to a traffic accident (crash) and subsequent repairs.
- 🔒 «Auto pound» – temporary seizure of a vehicle from the fleet; a car cannot be used to fulfill orders.
- ⛔ «Other» – any other reasons for the car being unavailable for work.
¶ Creating a «Single Driver» event
¶ Creation process
To create a 👤 «Single Driver» event, you must be at the level of a specific fleet in your MyTaxiCRM user account:
- Go to the Timetable section in the side menu of the MyTaxiCRM system → select the car for which you are creating an event → click anywhere on the free calendar field opposite the registration number of the selected vehicle;
- Заповність наступні поля у вікні, що зʼявилось:
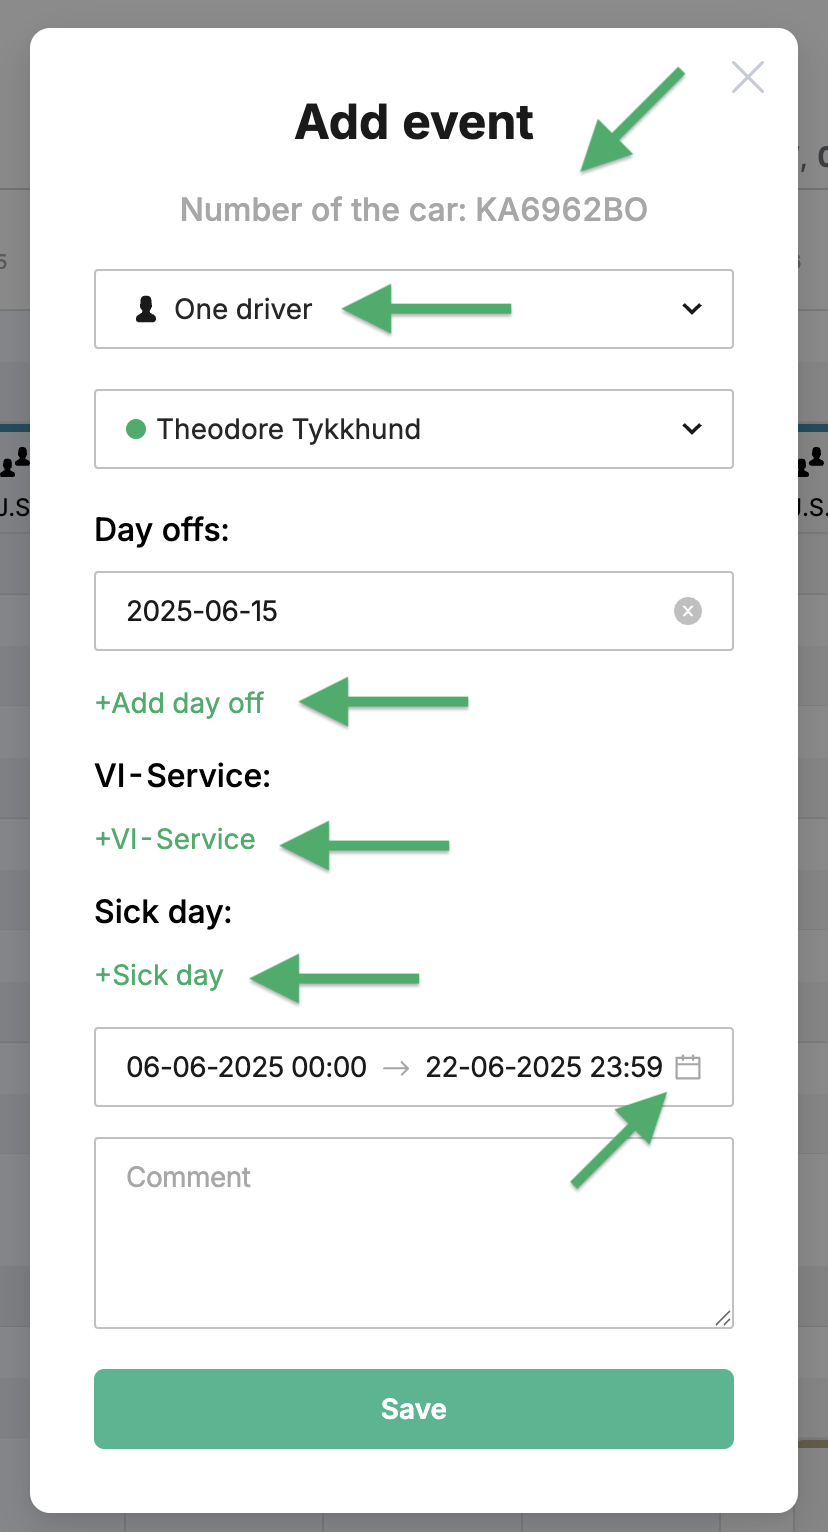
- Mandatory | Select event type → 👤 One driver;
- Mandatory | Select driver from the list or enter the first few letters of their name to narrow down the search;
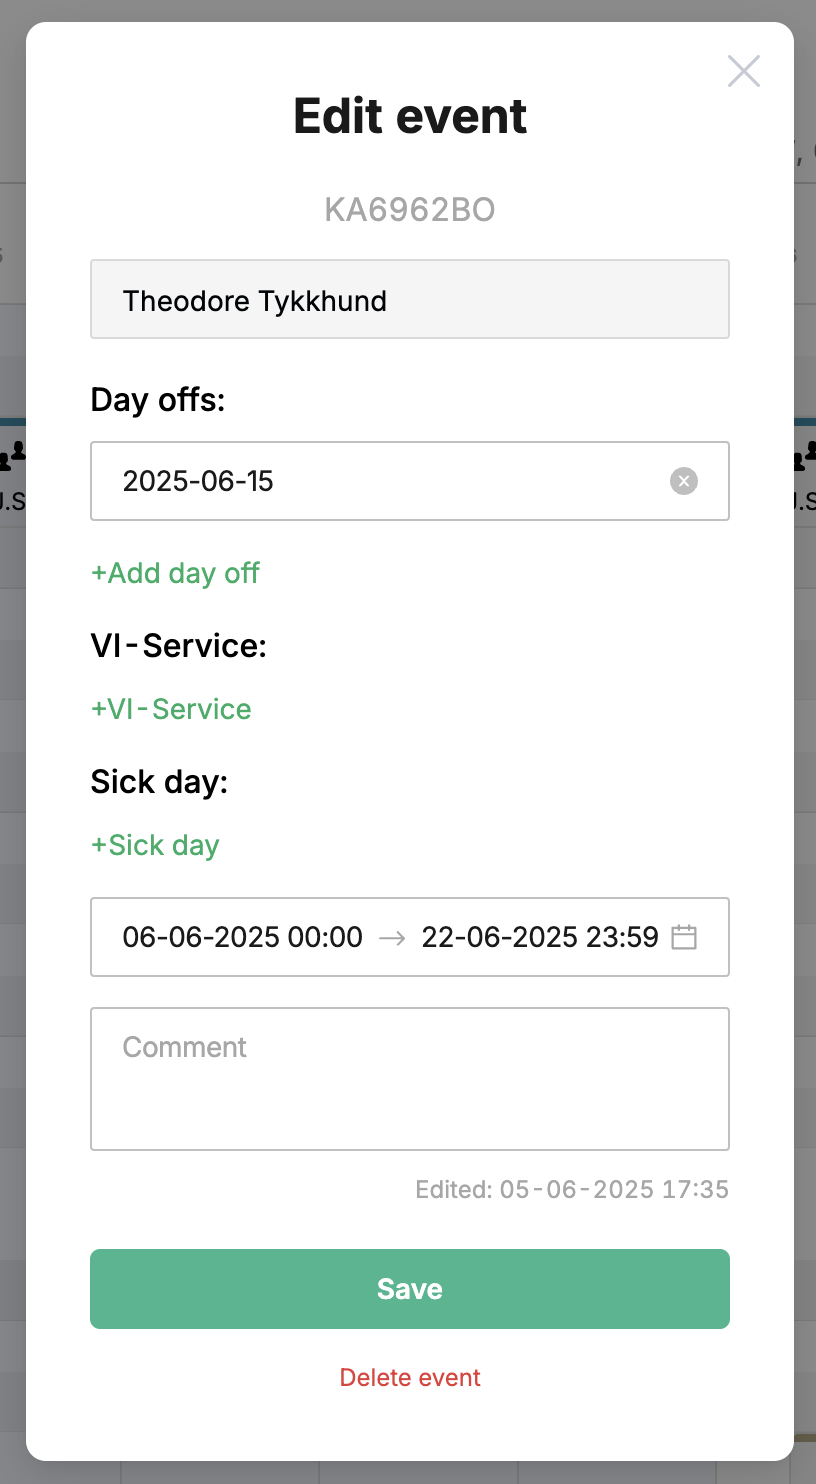
- Optional (your choice) | You can add dates for the following event components (multiple dates can be added for each variant):
- Day offs – when the car will retain its assignment to the specified driver, but the system will not expect actual trips to be made using it;
- VI-Service – The vehicle will remain tied to the driver, but the system will expect the specified downtime period due to minor maintenance (for major of this kind, when none of the fleet drivers should be responsible for the vehicle, we recommend using another type of event that helps with vehicle availability planning);
- Sick day – when the car will keep the binding to the chosen driver, but the system will not expect actual trips to be made using it (this variable is more useful when editing an event than when creating it – to keep track of situations when a driver has fallen ill and cannot work during a period that was planned in advance).
- Mandatory | Set the timespan using the Start date & End date boxes (type in the numbers or pick from the calendar);
- Not necessary | Add your text comment (in the Comment field).
- To add an event to the calendar schedule → Save.

¶ How to edit a previously created event?
There are two methods to modify any of the parameters of an event for this vehicle:
- Grab the blue edge of the event's starting point and drag it to the right or left to change its duration relative to the grid of calendar dates & times.
⚠️ If you stretch or shrink the event rectangle, only its total duration will change; the start and end dates of the components will remain unchanged (weekends, sick leave, repairs, etc.).
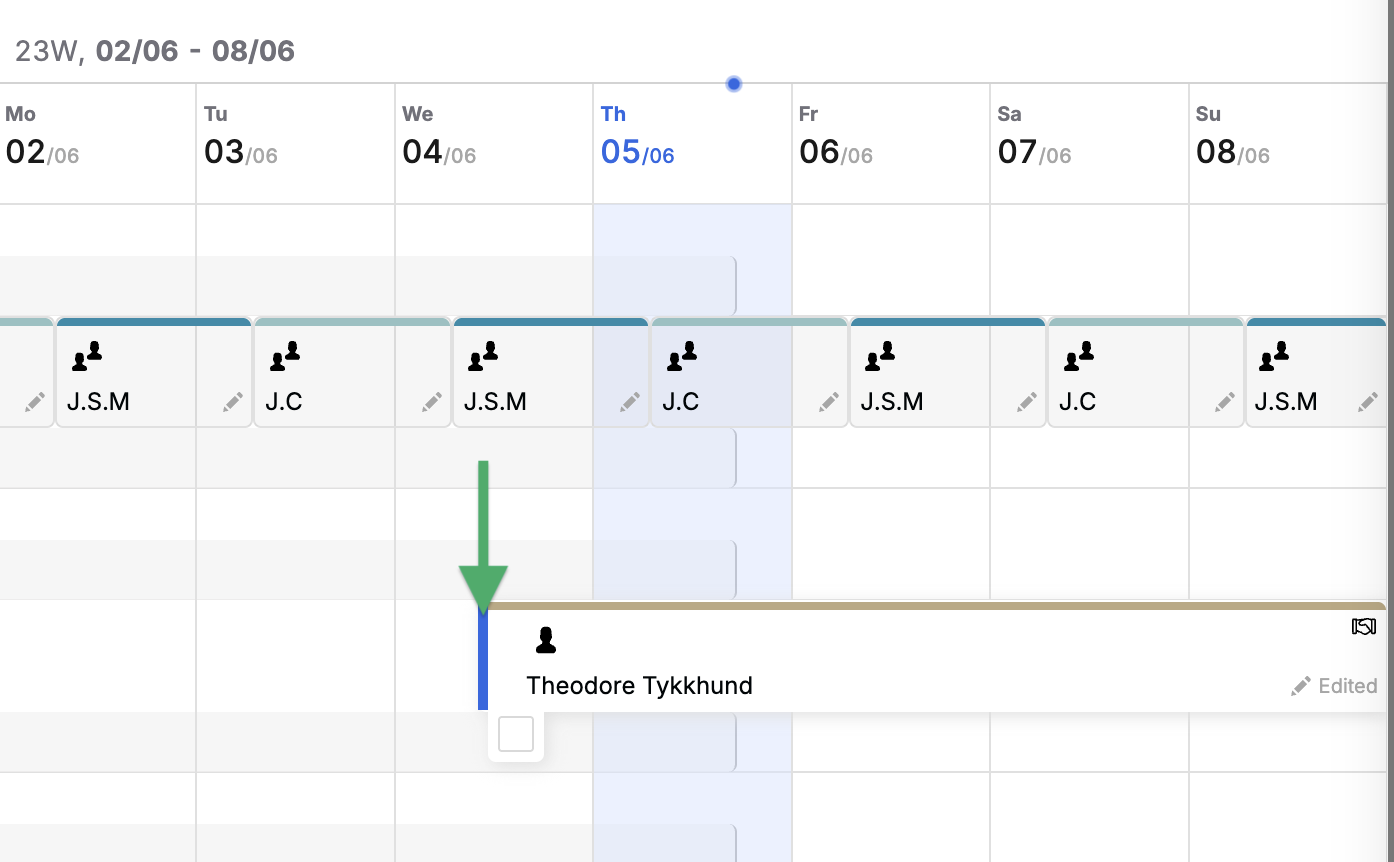
- Click on the event itself to bring up the editing window. Change the necessary settings there → Save.
⚠️ It is not possible to change the driver for an newely created event associated with the selected vehicle.
¶ How to delete a previously created event?
To delete an event, use the red Delete event button at the bottom of the editing window → Yes.
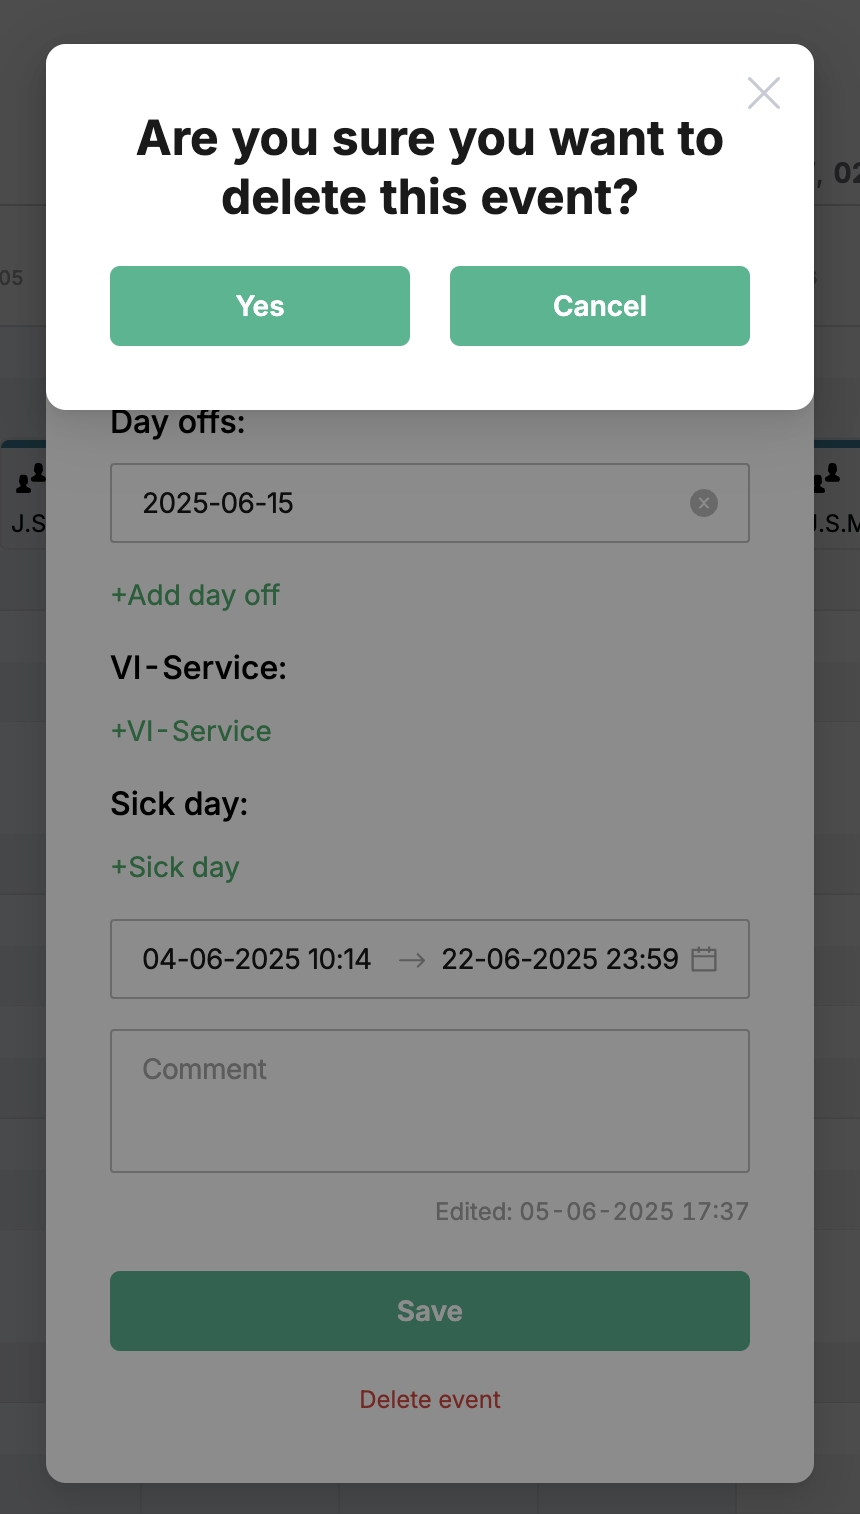
⚠️ The event itself and its components (e.g., days off or sick leave) are related to other sections & modules of the MyTaxiCRM system. Deleting an event or its individual components will affect related modules or sections of the system (for example, the metrics in the Driver's report card in the Reports section).
¶ Video Tutorial

📹 Check out related video explainer from our YouTube channel below 👇 HERE