¶ «Driver → Fleet» act: voluntary return of a car
In this article, we will look at the «Driver → Fleet» type of handover act, when a driver voluntarily (of their own desire) returns a car back to the fleet.
¶ Current state in the «Timetable» section
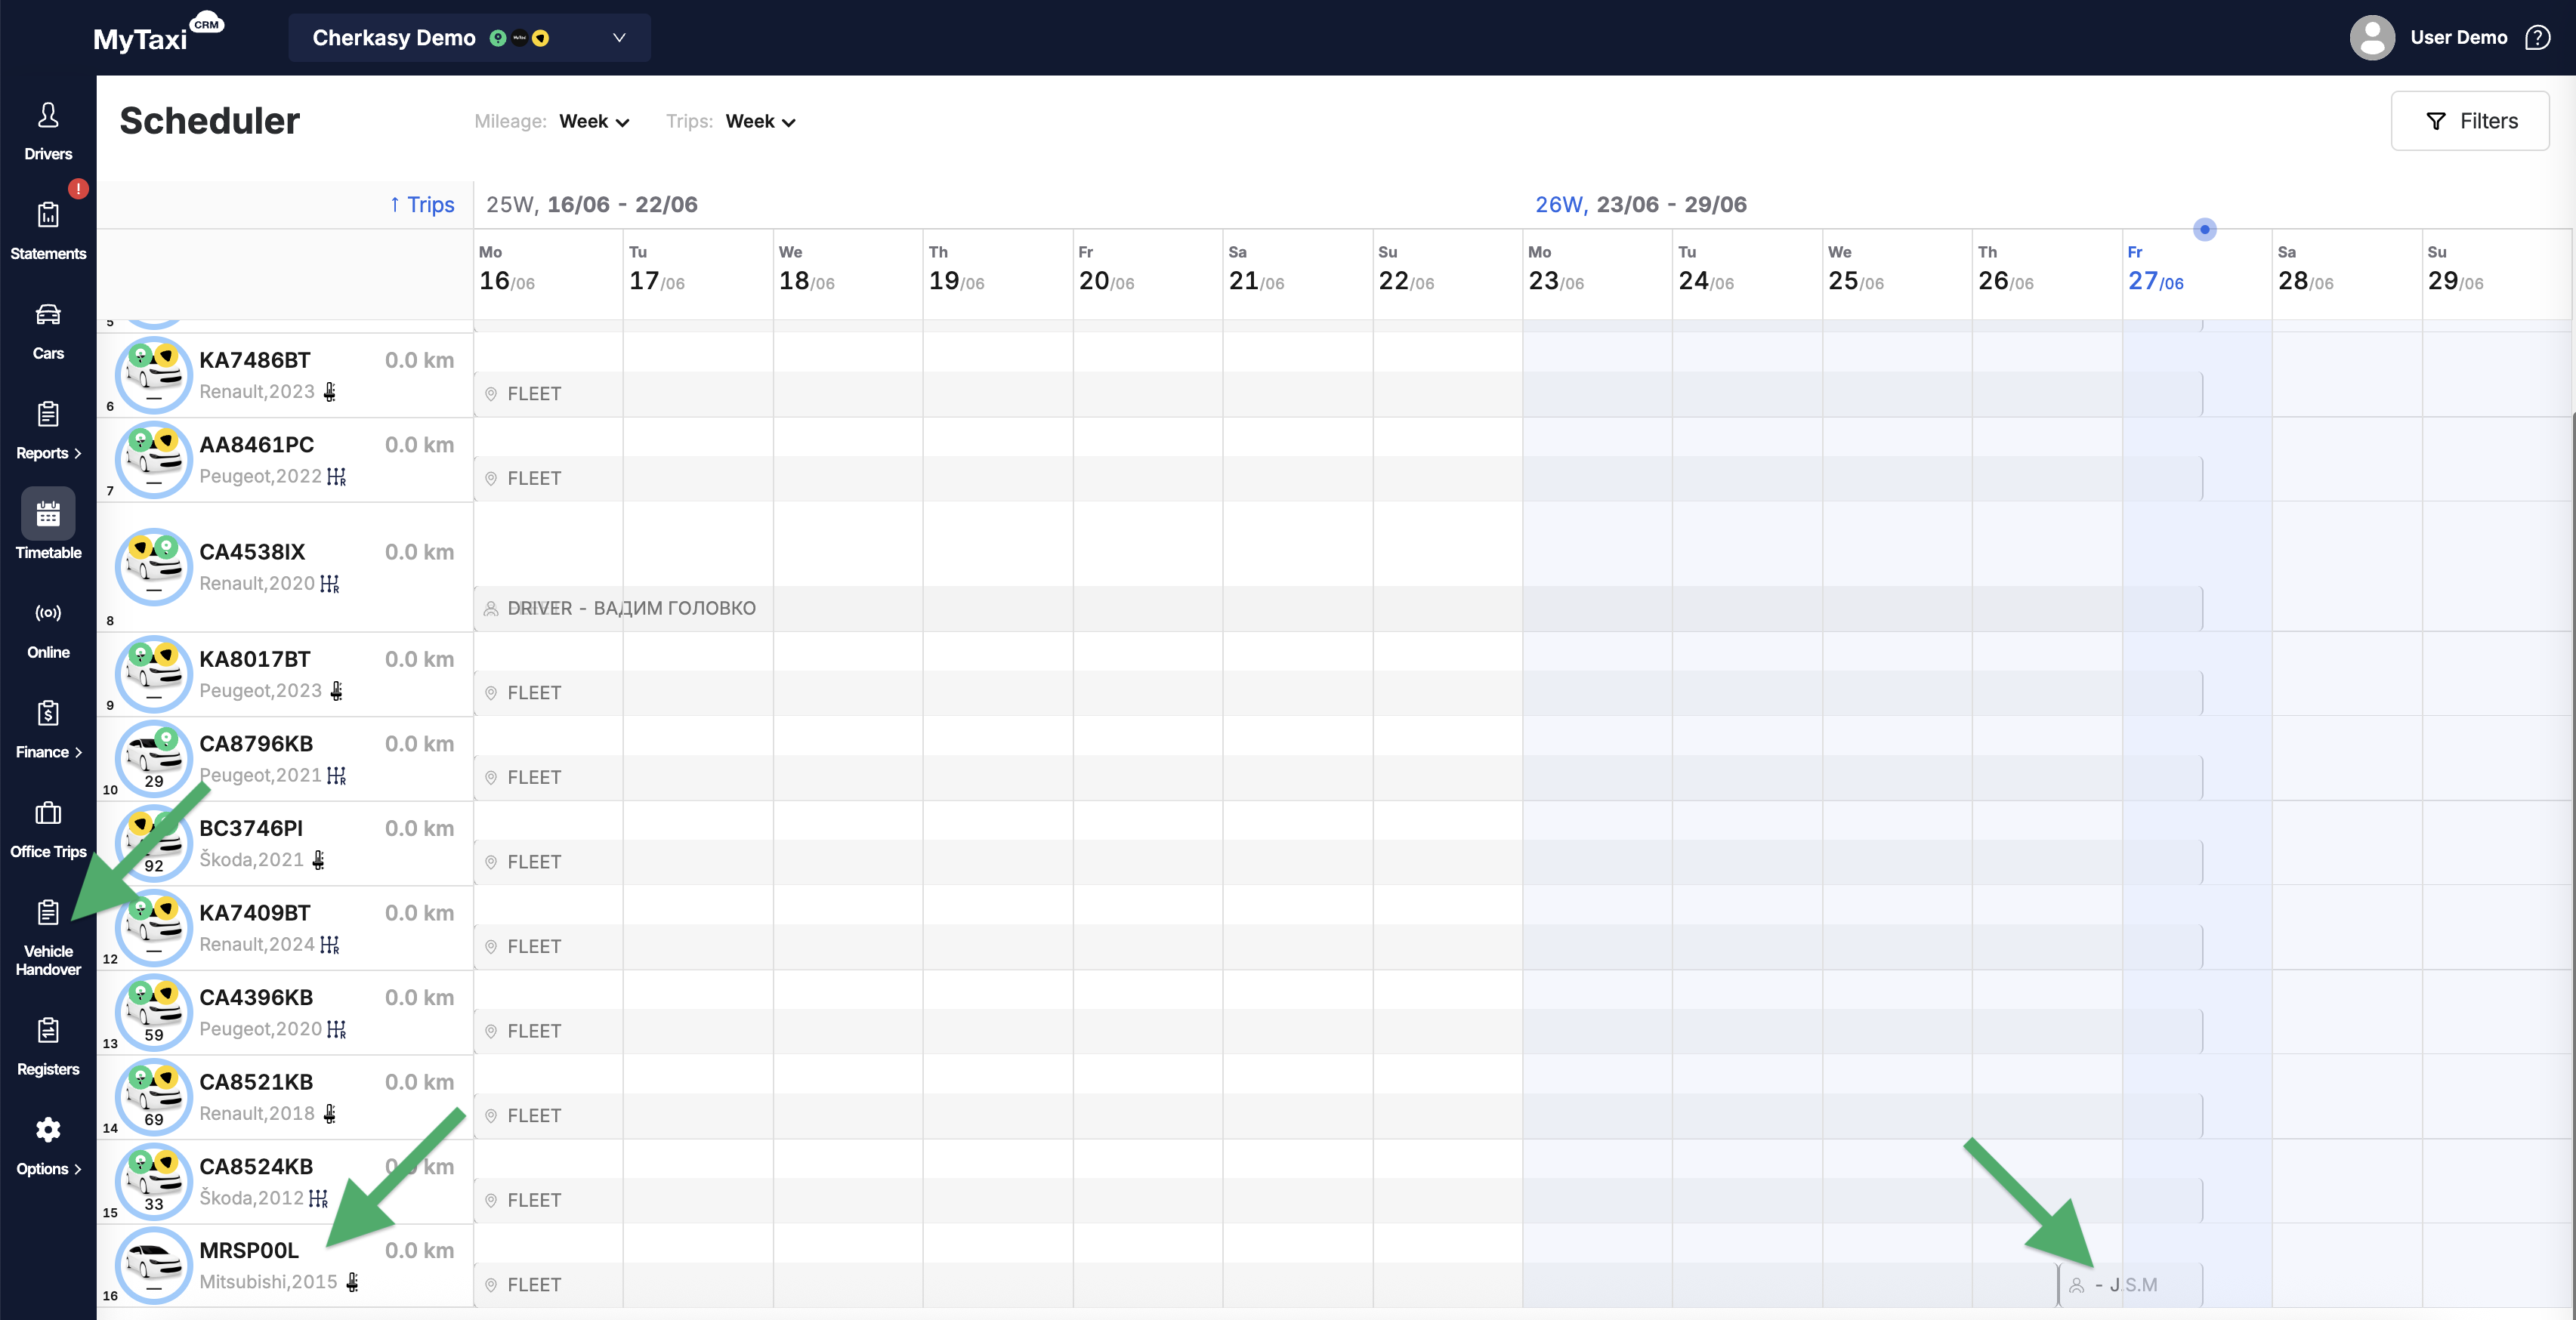
In the «Tibetable» section of the system (select the appropriate item from the menu on the left).
- We can see that the vehicle
Mitsubishi, 2015with license plateMRSP00Lis currently being used by driverJ.S.M.(John S. McCain) – the corresponding rectangle opposite the car indicates this.
¶ Creating an act of returning car to fleet by the driver
- Driver
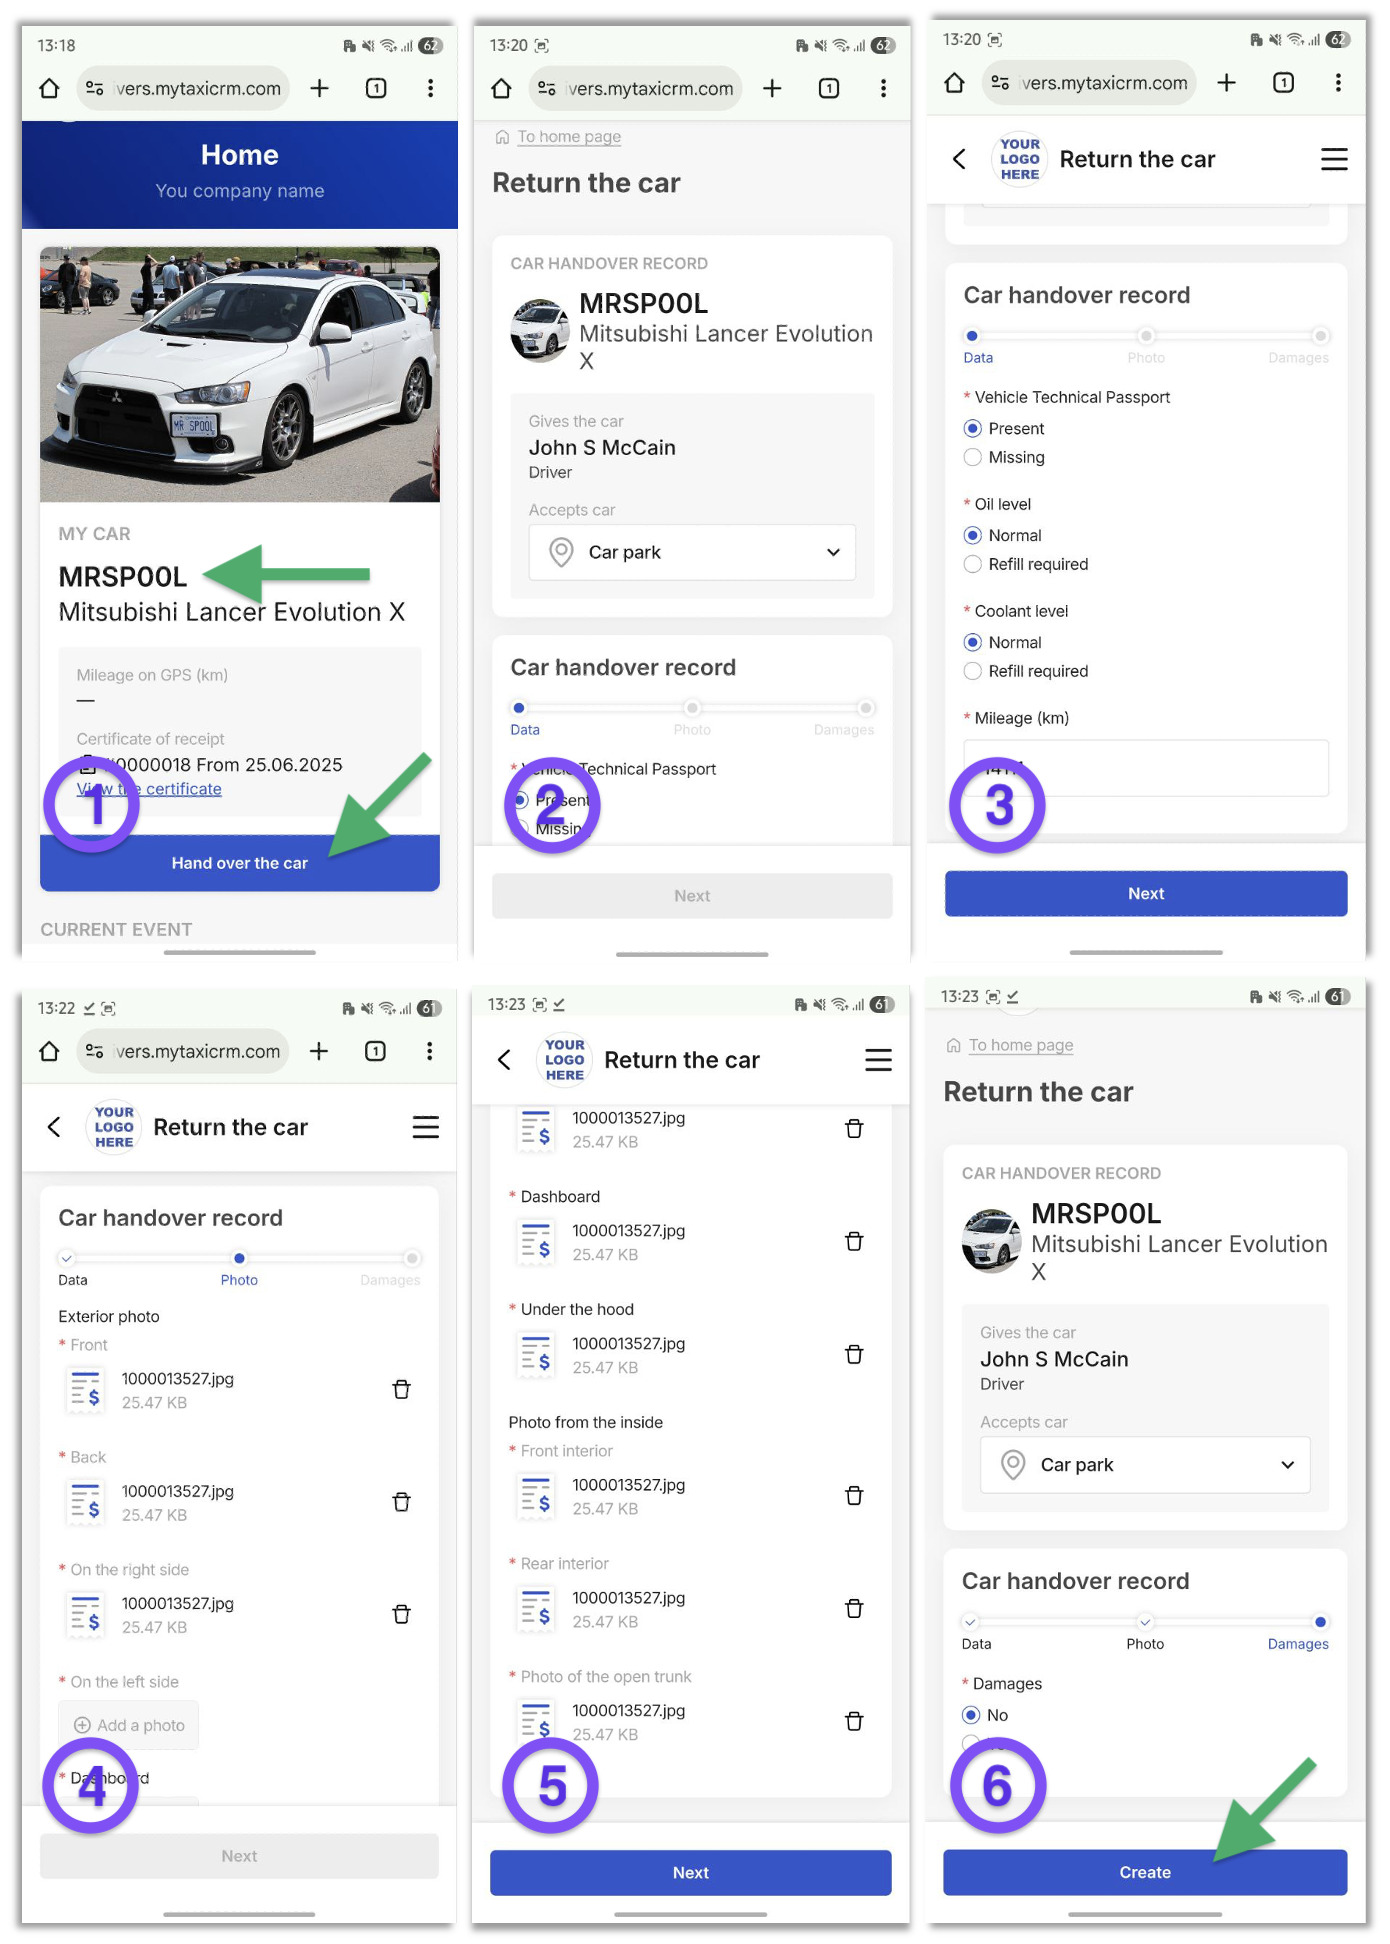
John S. McCainsees the car assigned to him (aMitsubishi Lancer Evolution XwithMRSP00Lnumberplate) on the main screen of his personal cabinet app and wants to voluntarily return it to the fleet.- To start creating the required handover act → use the blue button «Hand over the car».
- In the «Accepts car» menu, select «Car park» (this indicates to whom the vehicle is being transferred).
- In the «Data» block, select options for the following items:
- Vehicle Technical Passport – presence/absence of the relevant document;
- Oil level – based on current technical condition;
- Coolant level – based on current technical condition;
- Fill in the car's odometer reading at the time of transfer in the «Mileage (km)» field.
- In the «Photo» block → «Exterior photo», add the relevant photos of the vehicle using the «⊕ Add a photo» button:
- Front – we recommend taking a photo so that the numberplate is visible;
- Back – photo of the vehicle's rear;
- On the right side – photo of the right side;
- On the left side – photo of the left side;
- Dashboard – photo of the instrument cluster (we recommend doing this with the engine running so that the readings are visible in the shot, such as the odometer reading, the presence/absence of error indicators, etc.);
- Under the hood – open the bonnet, secure the lid, take a photo of the components & assemblies.
- In the «Photo» block → «Photo from the inside», add the relevant photos of the vehicle using the «⊕ Add a photo» button:
- Front interior – photo of the front of the cabin;
- Rear interior – photo of the passengers' compartment;
- Photo of the open trunk – open the trunk lid and take a photo.
- In the «Damages» block:
- If there are no new damages that occurred while the vehicle was in use by the driver, select No;
- If new damages occurred while the vehicle was in the driver's hands, select Yes and add their photos (one or more).
⚠️ To move through the form blocks, use the buttons: «Next» → «Next» → «Create» (if the button is gray, it means that not all mandatory fields have been completed; if it is blue, everything is fine and you can move on/finish).
⚠️ The forms of handover acts themselves are flexibly customizable – the fleet can change the necessity and/or visibility of various fields according to your company's needs (meaning that you can customize the number of photos required when filling out the form or the mandatory selection of a particular item).
¶ Created act in the driver's personal cabinet app
After creation, the driver can view the act in their personal cabinet app by clicking on the gray «View the certificate» button below the unique identifier (number) of the act itself: Certificate #0000019.
- In its detailed view, we can see the status of the act – Waiting for answers, which means that the act created in the system has been registered and is now available to the manager in the corresponding section of the MyTaxiCRM system for review.
-
- The driver also has the option to revoke the newly created act of returning the vehicle to the fleet (Cancel certificate button). In this case, the car will remain assigned to the driver.
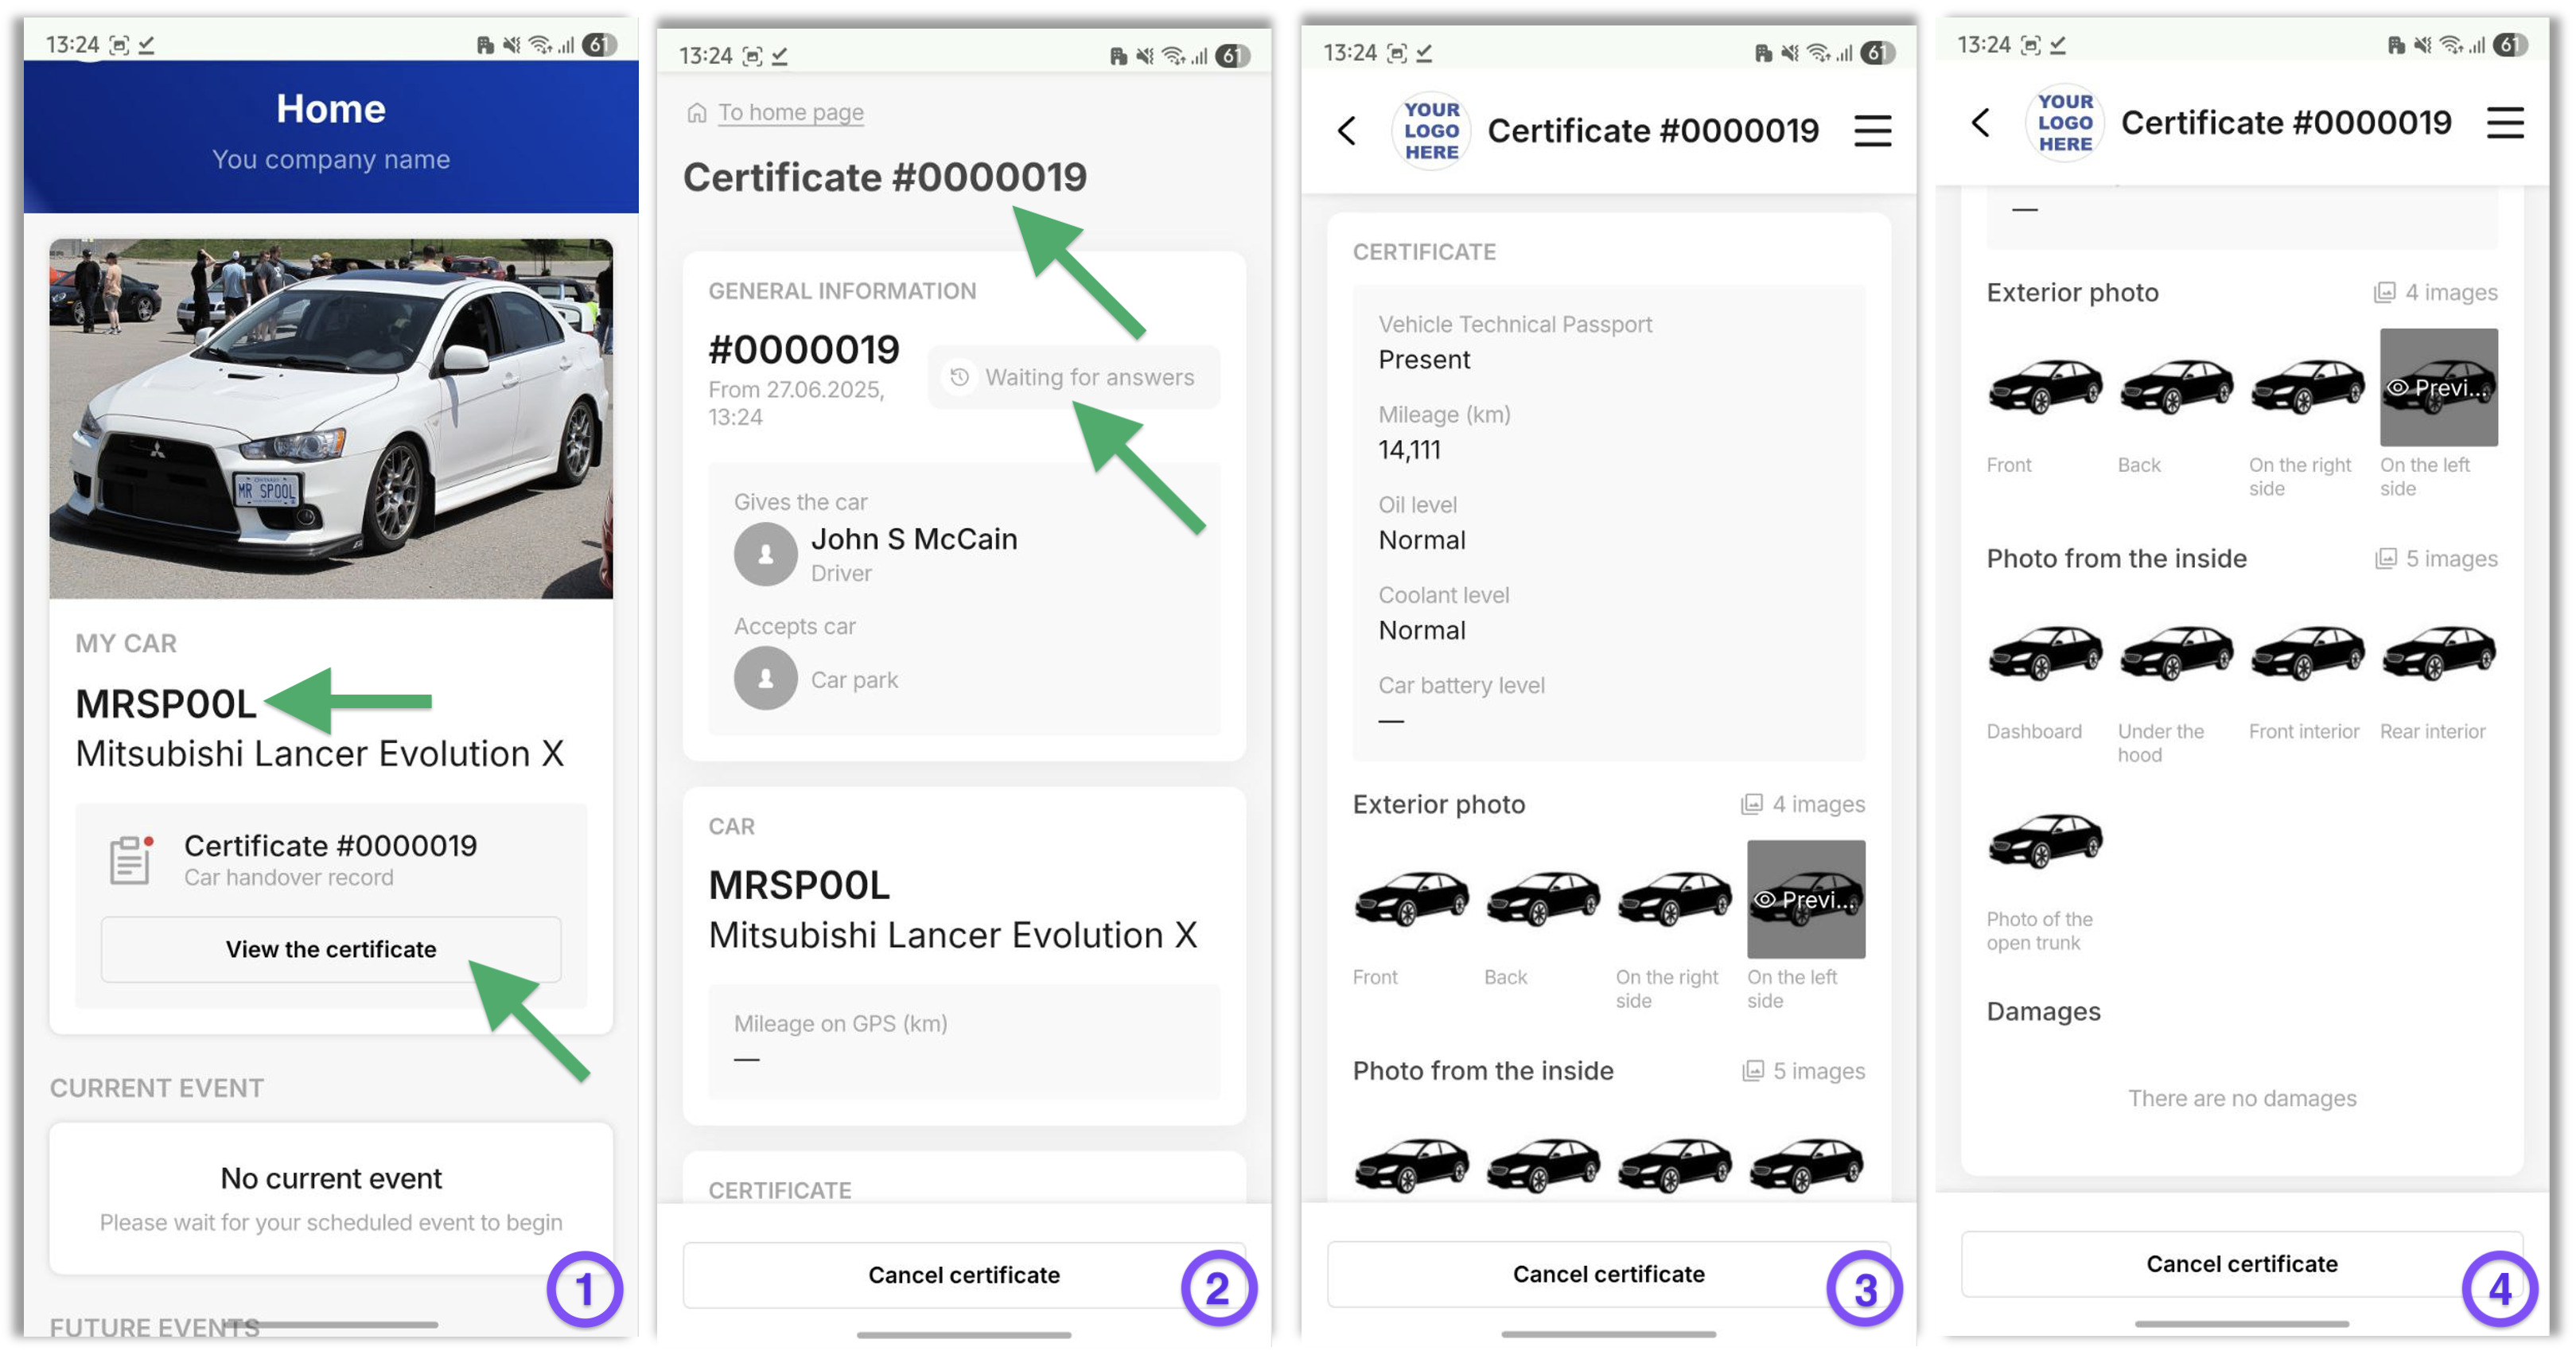
⚠️ The act may be withdrawn by the driver only until the fleet manager takes action.
¶ The return act in the «Vehicle Handover» section
As soon as the driver has finished creating the return act (transferring the car back to the fleet), it appears in the list with the corresponding status Waiting for accept.
- You can scroll right on the act row in the table to view its key details
- To examine an act, open its detailed view → click on its number (
#0000019) in the list.

Сторінка акту містить усі його деталі та інформацію, праворуч угорі є 2 кнопки:
- Red «Reject certificate» is used if the fleet manager disputes the accuracy or completeness of the vehicle data upon its return to the fleet.
- Green «Accept certificate» is used to return the car to the fleet and allow it to be assigned to another driver or removed for other purposes (maintenance, relocation, etc.).
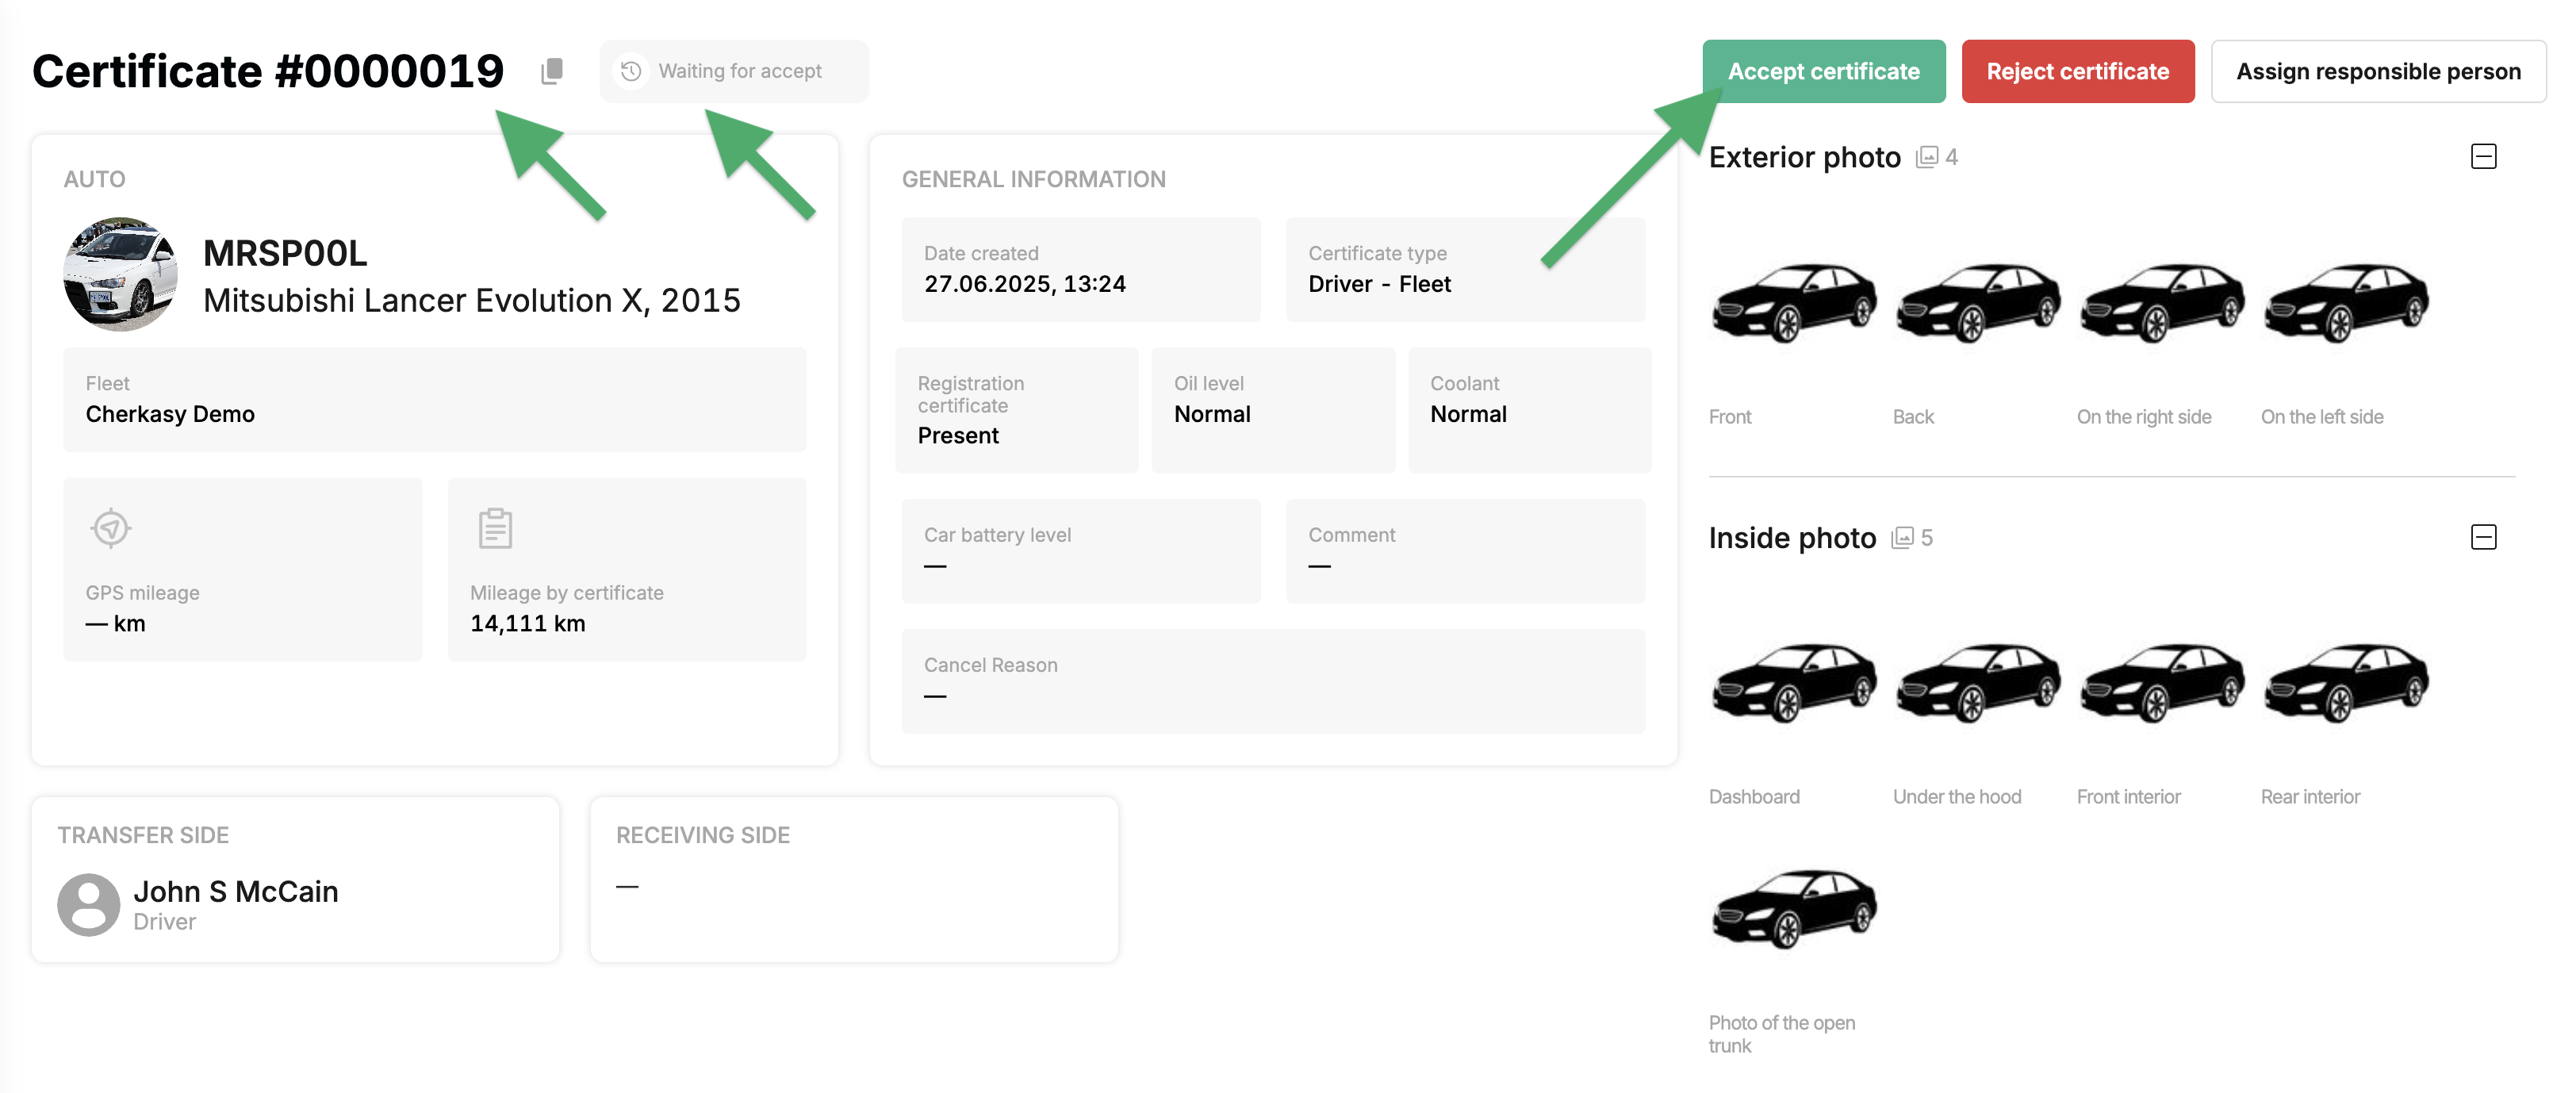
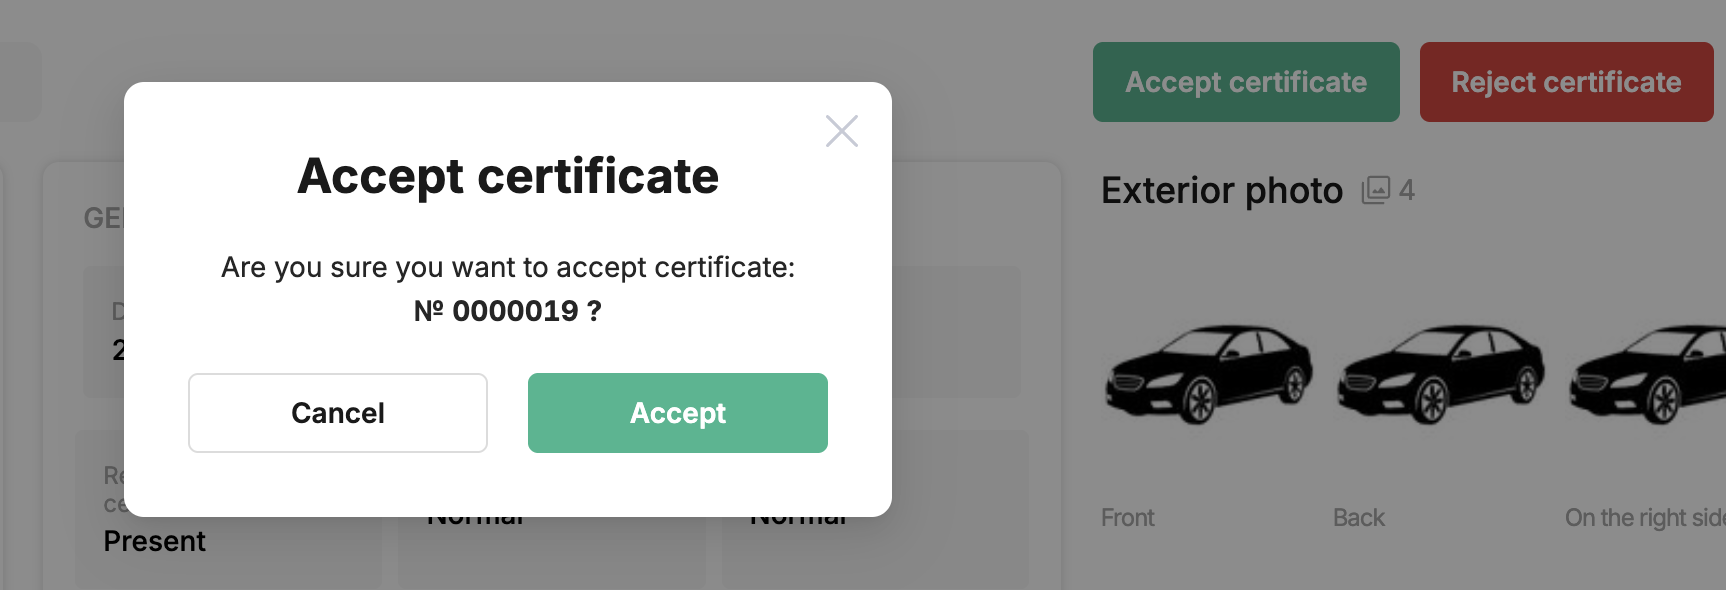
Click on the «Accept certificate» button & confirm your decision by clicking on the green «Accept» button.
¶ After the act has been accepted
- In the detailed view of the act, we see the status change to ✓ Confirmed.
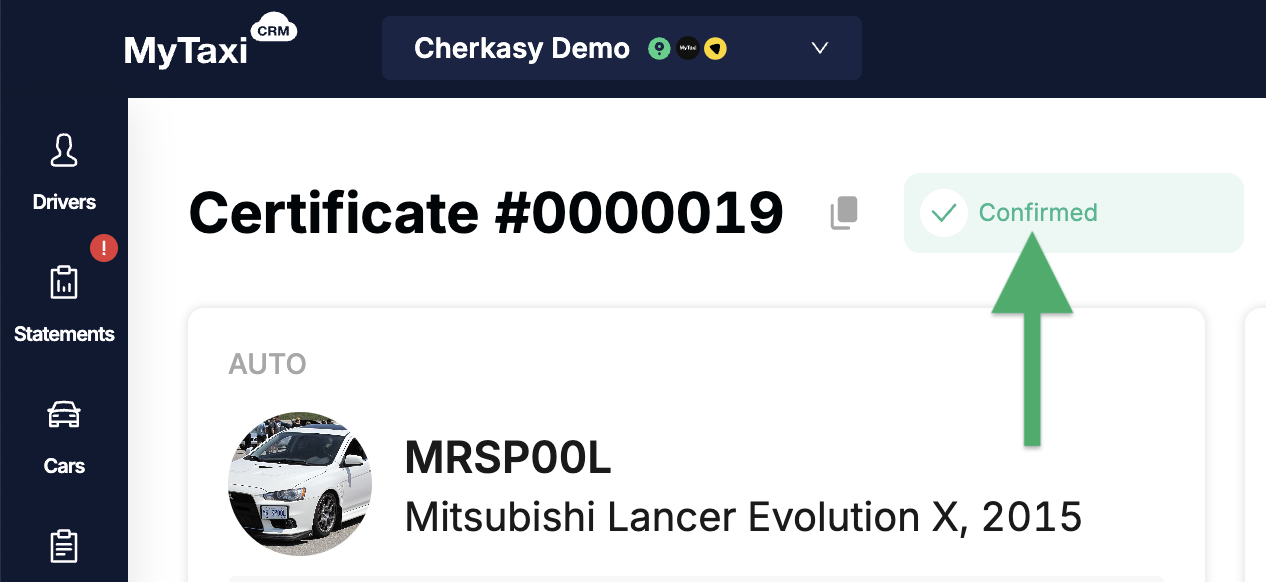
- In the list, this act (
#0000019) also receives the status ✓ Confirmed.

¶ Changes to the «Timetable»
In the calendar of the «Timetable» section, opposite the car (vehicle Mitsubishi, 2015 with number plate MRSP00L) that the driver returned to the fleet by creating a corresponding act in his personal cabinet, a gray rectangle with the driver's initials J.S.M. (John S. McCain) has ended and a new one with the label Fleet has started.
- This means that the vehicle has been successfully transferred along the Driver → Fleet flow and is now accounted for and assigned to the fleet company itself.

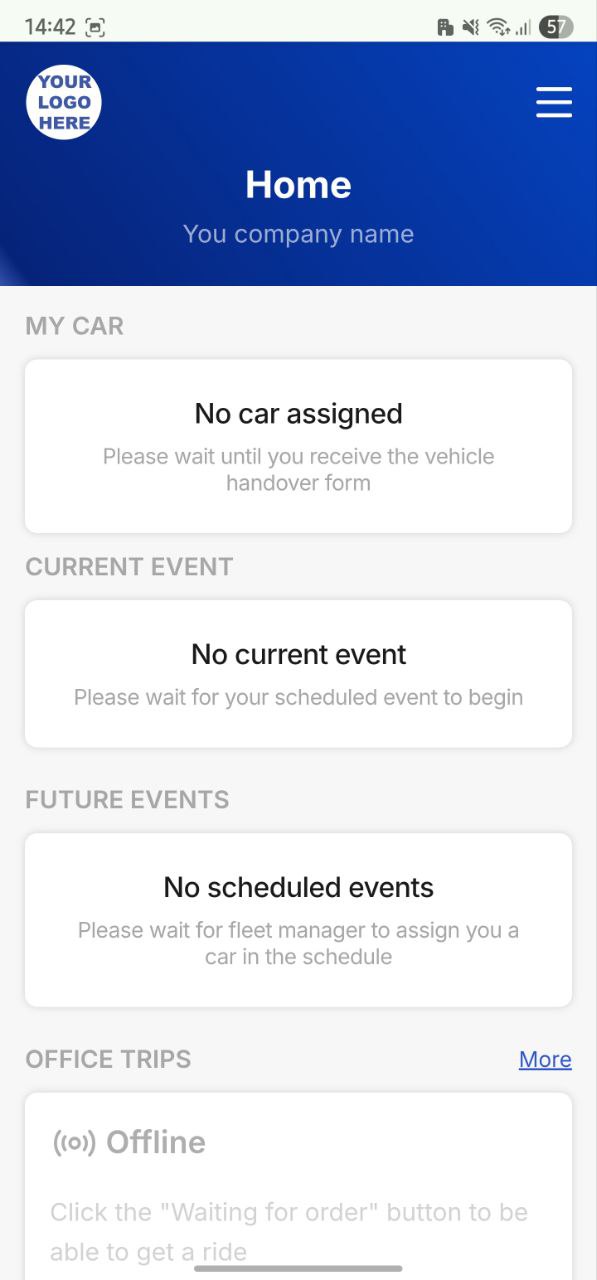
- In turn, this car disappears from the driver's personal cabinet.
¶ Video Tutorial

📹 Check out related video explainer from our YouTube channel below 👇 HERE